How to Start Vegetable Seeds Indoors: A Beginner-Friendly Guide
Are you excited to grow your own vegetables but don’t know where to start? No worries! Growing your own food from seeds is not only rewarding but also a great way to save money. Starting vegetable seeds indoors gives you a head start on the growing season, ensuring healthier and stronger plants. Let’s walk through everything you need to know to get started.
Why Start Vegetable Seeds Indoors?
Starting seeds indoors allows you to extend the growing season and get a jump on planting. If you live in a region with a short summer, this method ensures your plants have plenty of time to mature. It also gives you more control over temperature, moisture, and light—providing the perfect environment for your little seedlings to thrive. Plus, it’s exciting to watch tiny seeds turn into flourishing plants right before your eyes!
Another advantage of indoor seed starting is the ability to grow a wider variety of vegetables than what may be available at your local nursery. You can experiment with heirloom and specialty varieties not commonly found in garden centers. This allows you to customize your garden according to your preferences and dietary needs.

What You’ll Need to Start Seeds Indoors
You don’t need a fancy setup to start growing seeds inside—just a few simple supplies:
- Seeds – Choose easy-to-grow vegetables if you’re a beginner. Some seeds require different conditions for germination, so check the seed packets for specific instructions.
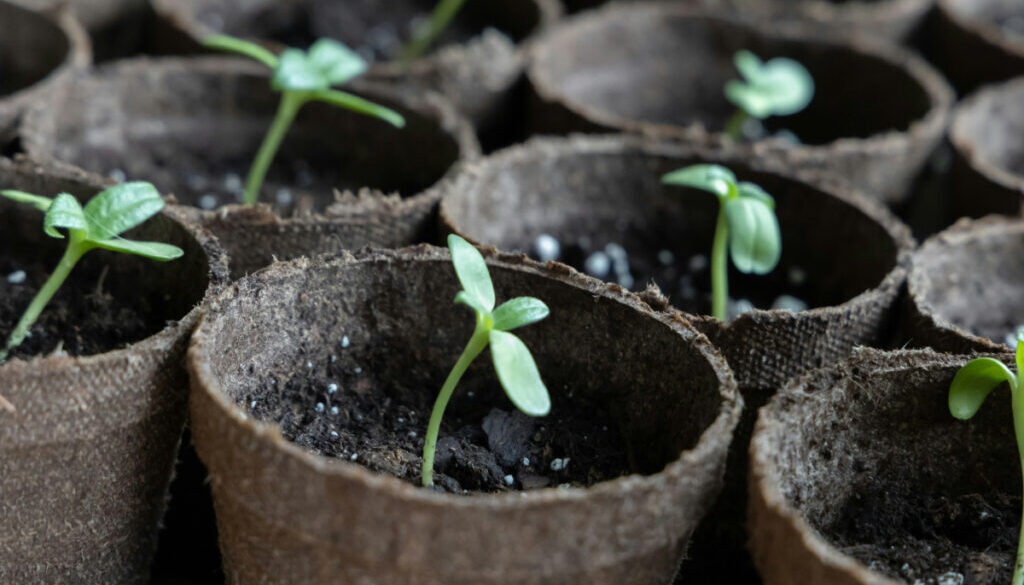
- Seed trays or small containers – Recycled yogurt cups, egg cartons, or biodegradable pots work well. Ensure your containers have drainage holes to prevent waterlogging, which can lead to root rot.
- Quality potting mix – Look for a light, well-draining mix made specifically for seed starting. Avoid using regular garden soil, as it can be too heavy and may contain pests or diseases that could harm young seedlings.
- Watering can or spray bottle – Gentle watering prevents washing away tiny seeds. A spray bottle works best for delicate seedlings, while a watering can with a fine spout is great for more established plants.
- Grow lights or a sunny window – Adequate light ensures strong, healthy seedlings. Natural sunlight may not always be enough, especially in winter or early spring, so consider investing in LED or fluorescent grow lights.
- Humidity dome or plastic wrap – Helps maintain moisture during germination. Covering your trays with a humidity dome or plastic wrap can create a greenhouse effect, keeping the environment warm and damp to speed up germination.
- Labels – Keep track of what you planted and where! Seedlings often look similar in their early stages, so labeling your containers will help you stay organized.
Once you gather your supplies, it’s time to get planting!
Step-by-Step Guide to Starting Seeds Indoors
1. Choose the Right Seeds and Planting Time
If you’re new to gardening, start with easy-to-grow vegetables that germinate quickly. Hardy vegetables that don’t require complicated care will set you up for success. Leafy greens, radishes, and tomatoes are great choices for beginners. Check the seed packets for germination times and growing requirements to ensure you pick the best varieties for your climate.
The best time to start seeds indoors depends on your last frost date. Most seeds should be started 6-8 weeks before the last frost in your area. Here’s a general timeline for common vegetables:
- Tomatoes & Peppers – Start indoors 6-8 weeks before the last frost.
- Lettuce & Spinach – Start 4-6 weeks before the last frost.
- Carrots & Radishes – Typically sown directly outdoors, but can start indoors 3-4 weeks early.
- Cucumbers & Zucchini – Start 3-4 weeks before the last frost.
- Beans – Usually sown directly, but if starting indoors, plant 3 weeks before transplanting.
- Herbs – Basil, parsley, and cilantro can be started 6-8 weeks before the last frost.
2. Fill Your Containers with Potting Mix
Use a light, well-draining seed-starting mix. Regular garden soil is too dense and may harbor fungi or pests that could hinder seedling growth. Lightly moisten the potting mix before filling your containers to create a well-balanced environment for seed germination.
3. Plant Your Seeds
Follow the seed packet instructions for planting depth and spacing. Some seeds need to be lightly covered with soil, while others require direct exposure to light. Plant multiple seeds per container in case some don’t sprout, but be prepared to thin them later if they all germinate.
4. Water Gently
Moisture is key, but overwatering can lead to mold or root rot. Use a spray bottle to keep the soil damp but not soggy. If you’re using a watering can, ensure it has a gentle spout to avoid disturbing the seeds. Watering from the bottom by placing trays in shallow water for absorption can also help prevent seed displacement.
5. Provide Adequate Light
Seedlings need about 12-16 hours of light per day. If you don’t have enough natural sunlight, consider using grow lights positioned a few inches above the seedlings. Adjust the height as the plants grow to prevent leggy, weak stems.
6. Keep the Temperature Just Right
Most vegetable seeds germinate best at temperatures between 65-75°F (18-24°C). A heating mat can help maintain warmth if needed, especially for heat-loving plants like tomatoes and peppers. Also keep a rotating fan running so that will mimic the wind of the outdoor environment to build strong roots and stems and prevent seedling diseases.
7. Thin the Seedlings
Once the seedlings grow their first true leaves, thin them by snipping the weaker ones at the base. This allows the strongest plants to thrive without competing for nutrients. Thinning prevents overcrowding and improves airflow, reducing the risk of diseases like damping-off.
8. Harden Off Before Transplanting
Before moving your seedlings outdoors, gradually expose them to sunlight and outdoor conditions for a few hours daily over a week. This process, called hardening off, strengthens the plants and reduces transplant shock, increasing their chances of survival.

Common Mistakes to Avoid
- Overwatering – Too much moisture can cause damping-off disease, leading to weak or dead seedlings.
- Using Garden Soil – Heavy soil can compact and suffocate roots; always use a light seed-starting mix.
- Insufficient Light – Without adequate light, seedlings become leggy and weak. Use grow lights if necessary.
- Skipping Hardening Off – Transplanting directly from indoors to outdoors without gradual exposure can shock and kill plants.
- Planting Seeds Too Deep – Some seeds require light to germinate; check seed packet instructions for depth recommendations.
- Overcrowding – Failing to thin seedlings can lead to competition for nutrients, resulting in weaker plants.
- Inconsistent Watering – Allowing soil to dry out too much can delay germination and stunt plant growth.

Conclusion
Starting vegetable seeds indoors is an exciting and rewarding process that helps you get a jump on the growing season. By following these steps and avoiding common mistakes, you’ll soon have a flourishing garden full of healthy plants ready to be transplanted outdoors.
Happy Gardening!


