Winter Sowing: Milk Jug Gardening Made Simple
What Is Winter Sowing?
Winter sowing is one of those gardening tricks that feels almost like magic. Imagine planting seeds in the middle of winter—when everything outside seems frozen and lifeless—and having them sprout into healthy plants by spring. Sounds impossible, right? But with winter sowing, it’s not only possible, it’s surprisingly easy! All you need are some seeds, soil, and milk jugs, and you’ll be well on your way to creating a thriving garden before the warm weather even begins.
The Magic Behind Winter Sowing
So, how does it work? Winter sowing takes advantage of nature’s rhythm. Think about how seeds naturally fall to the ground in autumn and germinate in spring. You’re essentially mimicking that process—but with a bit more control. The milk jug acts as a mini greenhouse, protecting your seeds from the harshest winter conditions while allowing them to experience the cold. This cold period, known as stratification, is necessary for many seeds to sprout. Once the weather warms up, the seeds know it’s time to wake up and grow.
What’s great about winter sowing is that it saves you the hassle of starting indoor seeds. There’s no need for grow lights, heat mats, or clearing space on your windowsills. Instead, your milk jugs sit outside, soaking up the sun and braving the elements—just like seeds would in the wild. It’s low-maintenance, beginner-friendly, and wonderfully efficient.
Why Milk Jugs?
Now, you might be wondering: why milk jugs? What makes them so special? Milk jugs are a genius choice for winter sowing because they’re sturdy, lightweight, and easy to work with. They’re also translucent, which means they let in just the right amount of sunlight while keeping the seeds cozy. Plus, using milk jugs is a great way to upcycle something you’d normally throw away. It’s gardening that’s good for the planet and your wallet—what’s not to love?
Each milk jug becomes its own little ecosystem. You cut it open, fill it with soil, plant your seeds, and tape it back up. The drainage holes you create prevent overwatering, and the venting holes allow air to circulate. Once sealed, the jug traps moisture, creating a humid environment that’s perfect for germination. It’s like giving your seeds their own personal greenhouse—but on a budget.
What Seeds Work Best?
Not all seeds are cut out for winter sowing, but many are! Hardy perennials, cold-tolerant vegetables, and self-sowing annuals tend to thrive in this setup. Think broccoli, kale, poppies, coneflowers, and snapdragons—these plants are tough and ready to handle a bit of frost. If a seed packet says “needs cold stratification” or “plant in early spring,” it’s probably a great candidate for winter sowing.
The beauty of this method is that it takes the guesswork out of timing. Since the seeds are outside, they germinate when conditions are naturally right for them. No more worrying about starting seeds too early or too late. Nature does the hard work for you, and you get to sit back and watch the magic happen.
Why Try Winter Sowing?
If you’re still on the fence about winter sowing, let me give you a few more reasons to give it a go. First, it’s ridiculously fun. There’s something deeply satisfying about planting seeds in the dead of winter and seeing them come to life. It’s like being part of a secret gardening club that knows how to outsmart the seasons.
Second, it’s a fantastic way to save money. By starting your seeds, you can grow a wide variety of plants for a fraction of the cost of buying seedlings. Plus, you’re repurposing milk jugs, which means fewer trips to the recycling bin and more room in your budget for extra seeds.
Finally, winter sowing is a wonderful way to connect with nature, even when the weather isn’t cooperating. It’s a reminder that life doesn’t stop just because it’s cold outside. With a little planning and creativity, you can turn the bleakest months of the year into a season of growth and possibility.
So, grab those milk jugs, stock up on seeds, and get ready to embrace the magic of winter sowing. Your garden will thank you come spring—and so will you.
DIY Planters and Hanging Pots
Getting creative with DIY planters and hanging pots is a fun way to add personality to your garden. Whether you’re upcycling old items or crafting something from scratch, these projects are perfect for sprucing up your outdoor space. You don’t need to be a professional crafter to make these—just a bit of imagination and some basic materials will do. Let’s dive into how you can turn everyday objects into charming planters and hanging pots.
Upcycle Everyday Items into Planters
Why toss out old items when you can give them a new life as planters? Those coffee cans, teapots, and even worn-out boots sitting in your garage are begging for a second chance. Imagine a row of colorful cans bursting with flowers or a pair of boots overflowing with trailing ivy—it’s like art for your garden! All you need to do is clean the item, add drainage holes, and fill it with soil and plants.
Milk jugs are another brilliant option. Cut them in half, decorate the outside with paint or markers, and you’ve got yourself a quirky planter. This is a great project for kids, too. They’ll love personalizing their milk jug planter, and it’s a wonderful way to teach them about recycling and gardening. Plus, you’ll get bonus points for being eco-friendly!
Crafting Hanging Pots from Scratch
Hanging pots don’t just save space—they add vertical charm to your garden. The best part? You can make them yourself without breaking the bank. Start with some sturdy twine or macramé cord and a few simple knots. Voilà—you’ve got a boho-inspired hanging pot holder! Pair it with a lightweight planter, and you’re good to go.
If macramé isn’t your style, consider repurposing baskets or wire containers. Line them with coconut coir or burlap to hold the soil, and attach strong hooks or chains for hanging. You can even use old colanders for a rustic look—the pre-existing holes make for excellent drainage! Just make sure whatever you use is sturdy enough to hold the weight of the soil and plants.
Painting and Decorating Your Creations
The beauty of DIY planters and hanging pots lies in the customization. Don’t be afraid to let your creativity shine. Paint your planters in bright, cheerful colors or patterns that match your garden’s theme. Stencils and spray paint can help you create intricate designs with minimal effort.
For a whimsical touch, try gluing small decorations like seashells, beads, or buttons to the surface. You could also wrap planters in twine or fabric for a textured look. If you’re using terracotta pots, consider sealing them with a weatherproof coating after decorating to keep your artwork vibrant through all seasons.
Practical Tips for DIY Planters
While crafting DIY planters is exciting, it’s important to keep functionality in mind. Always ensure your planters have proper drainage to prevent overwatering. Use a drill to make holes if the material allows, or add a layer of pebbles at the bottom for drainage.
Think about the size of the plants you’re growing. A small planter might look cute, but it won’t work for a plant with large roots. Similarly, hanging pots should be lightweight and securely fastened to avoid any accidents. Regularly check the strength of hooks and cords to keep everything safe.
Why DIY Planters Are Worth It
DIY planters and hanging pots aren’t just practical—they’re incredibly rewarding to make. Each piece becomes a reflection of your personality, adding a unique charm to your garden. Plus, creating them is a wonderful way to relax and enjoy some hands-on creativity.
You’ll also love the conversations your creations spark when friends visit your garden. “Where did you get that planter?” they’ll ask, and you’ll get to say, “Oh, I made that myself proudly!”
So, grab those old items lying around, some paint, and a bit of imagination. Before you know it, you’ll have a collection of unique planters and hanging pots that are as beautiful as they are functional. Happy crafting!
Essential Tools for a Successful Start
Starting a new project is always exciting, and gardening is no exception. But before you dive in, it’s essential to have the right tools at your fingertips. Whether you’re a seasoned green thumb or a total beginner, having the proper equipment can make all the difference. Let’s explore the must-have tools that will set you up for gardening success.
The Basics: Tools You Can’t Garden Without
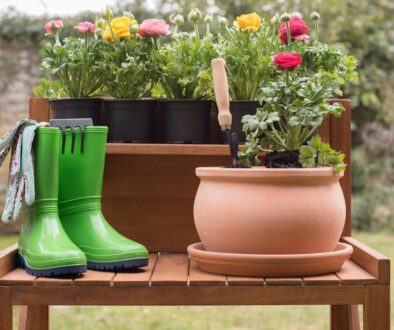
First things first, you’ll need a good pair of gardening gloves. These aren’t just for keeping your hands clean; they’ll protect you from thorns, splinters, and all those pesky little cuts. Look for gloves that are durable yet flexible so you can still handle delicate plants with ease.
Next up is a trusty trowel. This small hand tool is perfect for digging, planting, and scooping soil. Choose one with a sturdy handle and a sharp, rust-resistant blade—your hands will thank you later. A hand fork is another essential tool that’s great for loosening soil and pulling out weeds.
Don’t forget about a good-quality watering can or garden hose. Proper watering is the key to happy plants, and having a reliable way to deliver that water is crucial. If you’re working with smaller planters or hanging pots, a watering can with a long spout will help you reach those tricky spots.
Going Beyond the Basics
Once you’ve got the essentials covered, it’s time to step up your gardening game with some extra tools. A pair of pruning shears is a must for keeping your plants neat and healthy. Use them to trim dead leaves, shape your plants, or snip herbs for your kitchen. For thicker branches, a pair of loppers will come in handy.
A soil tester is another fantastic addition to your toolkit. It helps you understand the pH level and nutrient content of your soil, so you can make adjustments as needed. Healthy soil means healthy plants, after all! Speaking of soil, a small rake or cultivator is great for aerating the ground and mixing in compost or fertilizer.
For those of you who love DIY projects, don’t forget about your crafting tools. A hot glue gun, scissors, and some strong adhesive can work wonders when creating your custom planters and pots. These tools will ensure your creations are not only beautiful but also sturdy.
Stay Organized and Comfortable
Gardening is much more enjoyable when you’re organized and comfortable. Invest in a good garden tote or tool belt to keep all your essentials within reach. No more running back and forth to the shed to grab that one thing you forgot!
A kneeling pad or garden stool can also make a world of difference, especially if you’re spending a lot of time planting or weeding. Trust me, your knees will appreciate the extra cushioning. If you’re working in a larger garden, consider getting a wheelbarrow to transport soil, plants, and other heavy items with ease.
Safety First: Protect Yourself
While gardening is generally a relaxing activity, it’s important to stay safe. Always wear sunscreen and a wide-brimmed hat to protect yourself from the sun. If you’re using power tools or working with thorny plants, safety goggles, and sturdy boots are a must.
Also, keep a first-aid kit nearby. Accidents happen, and it’s always better to be prepared. A simple kit with band-aids, antiseptic wipes, and tweezers will cover most minor injuries.
Why the Right Tools Matter
Having the right tools isn’t just about making your life easier; it’s about enjoying the process. When you’re not struggling with dull shears or flimsy trowels, you can focus on the joy of nurturing your plants. Plus, quality tools last longer, saving you money in the long run.
So, before you start digging, planting, or crafting, take a moment to gather your essential tools. With the right equipment by your side, you’ll be ready to tackle any gardening challenge that comes your way.
Tips to Maximize Germination Success
Germinating seeds is one of the most exciting parts of gardening—it’s where life begins! Whether you’re growing flowers, vegetables, or herbs, a few simple tips can help you achieve the best results. Let’s explore how you can turn those tiny seeds into thriving plants with minimal fuss and maximum joy.
Choose High-Quality Seeds
The first step to successful germination is starting with quality seeds. Always check the expiration date on seed packets—old seeds might not germinate as well. If you’re saving seeds from your garden, store them in a cool, dry place to keep them viable. When shopping for seeds, opt for reputable brands or local nurseries to ensure you’re getting fresh, healthy options. Remember, happy plants start with happy seeds!
Prep Your Soil Mix
Seeds need the right environment to sprout, and the soil mix plays a big role in this. Use a seed-starting mix rather than regular garden soil. Seed-starting mixes are lightweight, well-draining, and free of pests or weeds. If you’re feeling adventurous, you can even make your mix by combining peat moss, vermiculite, and perlite. Just make sure the mix is moist—not soggy—before planting your seeds.

For winter sowing in milk jugs, add soil about three-quarters full, leaving room for air circulation. The soil should feel like a damp sponge: moist but not dripping. This creates the perfect environment for your seeds to sprout.
Plant at the Right Depth
Planting seeds too deep or too shallow can affect germination. Follow the depth instructions on the seed packet for the best results. As a general rule, plant seeds at a depth of about two to three times their size. Tiny seeds, like lettuce or petunias, should barely be covered, while larger seeds, like beans, need to go a bit deeper.
If you’re unsure, it’s always better to err on the side of shallow planting. Seeds can push upward more easily than they can struggle through layers of heavy soil.
Keep Moisture Levels Just Right
Seeds need consistent moisture to germinate, but too much water can drown them. After planting, gently mist the soil with a spray bottle to keep it evenly moist. Avoid overwatering, as standing water can lead to mold or rot.
If you’re using milk jugs, the enclosed environment helps retain moisture, so you won’t need to water as often. Check the soil periodically; if it feels dry to the touch, give it a light misting. A clear plastic cover or lid can also help trap humidity if you’re starting seeds indoors.
Provide the Right Temperature
Most seeds have a preferred temperature range for germination. Check your seed packet for specific requirements, but generally, 65-75°F is ideal. For winter sowing, the natural fluctuations in outdoor temperatures work in your favor—hardy seeds will germinate when conditions are just right.
If you’re starting seeds indoors, you might need a heat mat to maintain consistent warmth. Place the mat under your seed trays and watch those little sprouts pop up in no time. Just don’t overdo it—seeds can’t handle excessive heat.
Light It Up
Once your seeds sprout, they’ll need plenty of light to grow strong. If you’re winter sowing outdoors, natural sunlight will do the trick. Position your milk jugs in a sunny spot, ideally where they’ll get 6-8 hours of light per day.
For indoor seed starting, invest in a grow light if you don’t have enough natural light. Place the light about 2-3 inches above the seedlings, adjusting as they grow. Proper lighting prevents leggy seedlings and encourages healthy, compact growth.
Be Patient and Observant
Germination takes time, so don’t worry if you don’t see immediate results. Some seeds sprout in days, while others take weeks. Keep an eye on your soil moisture and temperature, and resist the urge to dig around to check on seeds.
If you notice mold or algae forming, adjust your watering habits or improve air circulation. A small fan can help if you’re growing indoors. Gardening is all about learning and adapting, so don’t be discouraged by minor setbacks.
Celebrate Small Wins
Every sprout is a victory worth celebrating! Once your seeds germinate, you’re well on your way to a thriving garden. Transplant your seedlings when they’re strong enough, and enjoy the satisfaction of watching your hard work pay off.
With these tips, you’ll maximize your germination success and start your gardening journey on the right foot.
Happy Gardening!


