Common Mistakes to Avoid When Direct Sowing Seeds
Direct sowing seeds can feel like a magical process—you plant, water, and wait for nature to do its thing. But even the simplest gardening tasks can go sideways if you’re not careful. Whether you’re a beginner or a seasoned gardener, avoiding common mistakes can make the difference between a thriving garden and a disappointing one. Let’s dive into the pitfalls you should steer clear of when direct sowing seeds.
Skipping Soil Preparation: Don’t Rush This Step!
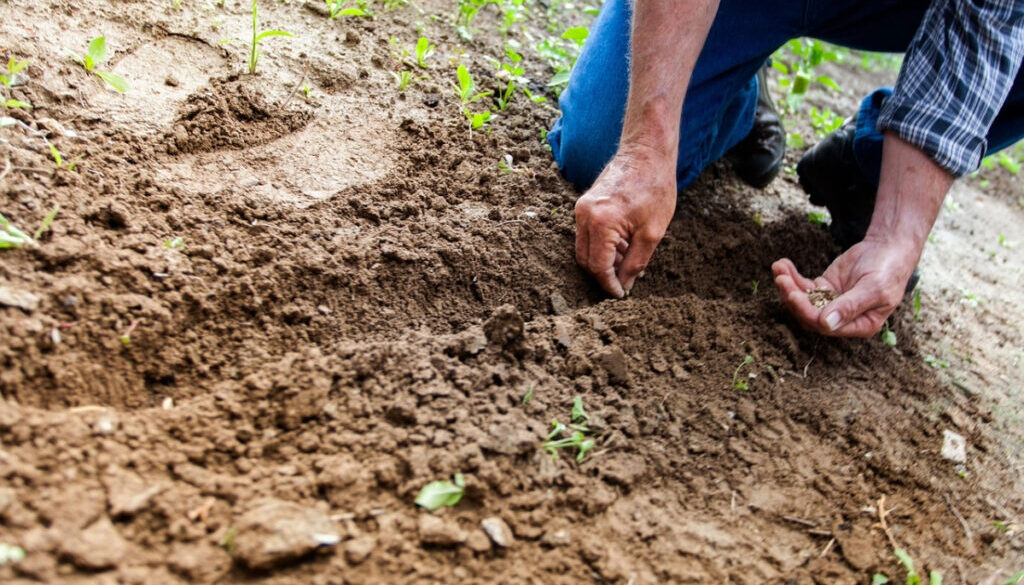
One of the biggest mistakes you can make is neglecting to prepare your soil properly. Think of soil as the foundation of your garden—if it’s not right, your seeds won’t thrive. You might be tempted to skip this step, especially if you’re eager to get planting but trust me, it’s worth the effort.
Start by loosening the soil to ensure it’s not compacted. Compacted soil makes it hard for roots to grow and for water to penetrate. You should also remove any weeds or debris that could compete with your seeds for nutrients. Adding compost or organic matter can boost soil fertility, giving your seeds the best start possible.
Another common oversight is failing to check the soil’s pH level. Some plants prefer acidic soil, while others thrive in alkaline conditions. A simple soil test can save you from planting seeds in an environment where they’ll struggle to grow in. Remember, healthy soil equals healthy plants!
Planting Too Deep or Too Shallow: Depth Matters
Have you ever planted seeds and waited weeks, only to see nothing sprout? The problem might be how deep you planted them. Planting seeds at the wrong depth is a common mistake that can prevent them from germinating.
Each type of seed has an ideal planting depth, usually listed on the seed packet. If you plant too deep, the seedling might not have enough energy to reach the surface. On the other hand, planting too shallow can expose the seeds to drying out or being eaten by birds.
A good rule of thumb is to plant seeds at a depth of two to three times their width. For tiny seeds, like lettuce or carrots, a light covering of soil is often enough. For larger seeds, like beans or peas, you’ll need to dig a little deeper. When in doubt, follow the instructions on the seed packet—they’re there for a reason!
Overwatering or Underwatering: Finding the Sweet Spot
Watering might seem straightforward, but it’s easy to get wrong when direct sowing seeds. Too much water can drown the seeds or cause them to rot, while too little can leave them parched and unable to germinate.
The key is to keep the soil consistently moist but not waterlogged. After planting, give the soil a gentle soak to ensure the seeds have enough moisture to start the germination process. Then, check the soil daily—if the top layer feels dry, it’s time to water again.
A common mistake is using a heavy stream of water, which can displace the seeds or create puddles. Instead, use a watering can with a fine rose or a gentle spray nozzle to distribute water evenly. Mulching can also help retain moisture and reduce the need for frequent watering.
Ignoring Spacing Guidelines: Crowding is a No-No
It’s easy to get carried away and plant too many seeds in one spot, especially if you’re working with a small garden. But overcrowding is a recipe for disaster. When plants are too close together, they compete for sunlight, water, and nutrients, leading to stunted growth and poor yields.
Always follow the spacing guidelines on the seed packet. If it says to space seeds 6 inches apart, resist the urge to plant them closer. If you’re worried about gaps, remember that you can thin out seedlings later. Thinning might feel harsh, but it’s necessary to give the remaining plants room to thrive.
For larger plants, like squash or tomatoes, proper spacing is even more critical. These plants need plenty of room to spread out, and overcrowding can lead to disease and pest problems. A little patience and planning can go a long way in ensuring a healthy, productive garden.
Forgetting to Label Your Rows: Avoid the Mystery Plants
You might think you’ll remember where you planted everything, but trust me, you won’t. Forgetting to label your rows is a common mistake that can lead to confusion later on.
Imagine waiting weeks for your carrots to sprout, only to realize you’ve been nurturing a row of weeds instead. Labels help you keep track of what you’ve planted and where making it easier to care for your garden.
You don’t need anything fancy—a simple stick or stone with the plant’s name written on it will do. If you’re feeling creative, you can make decorative labels using popsicle sticks or old spoons. The important thing is to label as you go, so you don’t forget.
Neglecting Pest Protection: Don’t Let Critters Ruin Your Hard Work
Pests can wreak havoc on your newly sown seeds, and failing to protect them is a mistake you’ll regret. Birds, slugs, and insects are just a few of the culprits that might feast on your seeds before they even have a chance to grow.
One simple way to protect your seeds is to cover them with a lightweight row cover or mesh. This barrier keeps pests out while allowing sunlight and water to reach the soil. You can also try natural deterrents, like crushed eggshells or diatomaceous earth, to keep slugs and insects at bay.
Another common mistake is ignoring signs of pest damage. If you notice holes in leaves or missing seedlings, act quickly to identify and address the problem. The sooner you tackle pest issues, the better your chances of saving your plants.
Planting at the Wrong Time: Timing is Everything
Timing is crucial when it comes to direct sowing seeds. Planting too early or too late can result in poor germination or weak plants. Each type of seed has an optimal planting time, usually based on your local climate and frost dates.
A common mistake is planting warm-season crops, like tomatoes or peppers, too early in the spring. These plants are sensitive to cold and won’t thrive until the soil has warmed up. On the other hand, cool-season crops, like spinach or peas, can struggle if planted too late in the season.
To avoid this mistake, research the best planting times for your area and follow the recommendations on the seed packet. You can also use a gardening calendar or app to keep track of planting dates. A little planning can save you a lot of frustration later on.
Overlooking Seed Quality: Start with the Best
Not all seeds are created equal, and using old or low-quality seeds is a mistake that can lead to poor results. Seeds lose viability over time, and even if they do germinate, the plants might be weak or unproductive.
Always check the expiration date on seed packets and opt for fresh seeds whenever possible. If you’re saving seeds from previous years, store them in a cool, dry place to extend their shelf life. You can also perform a simple germination test by placing a few seeds on a damp paper towel to see if they sprout.
Investing in high-quality seeds from a reputable supplier is worth the extra cost. After all, your garden’s success starts with the seeds you plant.
Ignoring Weather Conditions: Work with Nature
Mother Nature can be unpredictable, and ignoring weather conditions is a mistake that can cost you. Planting seeds just before a heavy rainstorm can wash them away, while sowing during a heatwave can dry out the soil and prevent germination.
Before you plant, check the weather forecast for the coming week. Ideally, you want mild, consistent weather that will give your seeds the best chance to thrive. If extreme weather is on the horizon, consider delaying your planting until conditions improve.
You can also use the weather to your advantage. For example, planting before a light rain can help settle the soil and provide natural moisture for your seeds. Working with nature, rather than against it, is the key to successful direct sowing.
Failing to Thin Seedlings: Give Them Room to Grow
Thinning seedlings might feel like a waste, but it’s a necessary step for a healthy garden. When you plant seeds, it’s common to sow more than you need to ensure good germination. However, failing to thin the seedlings can lead to overcrowding and poor growth.
Once your seedlings have a few sets of true leaves, it’s time to thin them out. Choose the strongest, healthiest plants and remove the rest, leaving the recommended spacing between them. This might feel harsh, but it’s better to have a few strong plants than a lot of weak ones.
You can use the thinned seedlings in salads or compost them, so they don’t go to waste. Thinning might seem like extra work, but it’s a small price to pay for a thriving garden.
 Conclusion: Learn from Your Mistakes
Direct sowing seeds is a rewarding experience, but it’s not without its challenges. By avoiding these common mistakes, you can set yourself up for gardening success. Remember, every gardener makes mistakes—it’s all part of the learning process.
The key is to stay curious, keep experimenting, and don’t be afraid to ask for advice. Whether you’re a beginner or a seasoned pro, there’s always something new to learn in the garden. So grab your seeds, get your hands dirty, and enjoy the journey!
Happy Gardening!


